VCenter 5.0 to 5.1 U1 Upgrade while Separating or Splitting out Services (Part 2): Web Client upgrade
May 28, 2013 2 Comments
In part 1 we installed SSO and we will now install the web client. This step does not have to be done next, but I recommend it because it will allow you to login with your domain credentials as you install things and you can see services being registered.I have the Web Client currently running on our Vcenter server so that when logging into the Web Client and the Vcenter Application server are same name and it is an easy transition to using the web client. You can split out the web client onto it’s own server and uninstall your old web client later, but for this guide we will assume you are upgrading your existing installation. The install will require a reboot so if you need to put in change control or let users know before upgrading now is the time to do so.
A couple items to note prior to installation:
a. Any local groups will not be imported into the permissions for your new Vcenter once that is upgraded. All other permissions and groups should get imported during the Vcenter upgrade.
b. For an upgrade, it should recognize the domain source that the server you install on is joined to.
Let’s get this going!
1. Log onto your vcenter or your current web client server and run the installer for the Web Client from your 5.1 U1 Vcenter download. Hit next.


2. Keep default ports or set the ports for connecting to the web client and hit next.

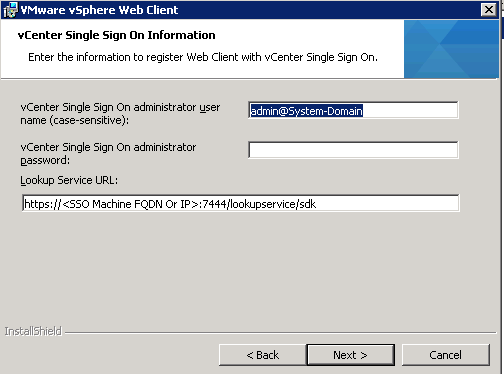
3. Enter the password for the default user you created during the SSO install and the FQDN of your SSO server that was built.
4. Install the default certificates for the web client. You can replace these at a later date with your CA signed certificates using the SSL Automation Tool provided by VMware, but I have found that self signed are sufficient for most organizations.

5. Choose install and wait for the install to complete.


6. Restart your system or choose no and restart when available.

7. Installation is done, but you will want to set your Default domain so that when you upgrade the Vcenter Service you will be able to login. Go the the web browser https://FQDN.webclient.com:9443 and login with the default username admin@system-domain and the password you set.

8. Click on Home -> Administration -> Configuration. Your Identity source for your domain should already be listed there. On the bottom under Default Domains make sure your domain is down there and move it to the top of the list and hit the save button

9. If you ever have an issue, you can always login with admin@system-domain.
Part 3 will be to install the Inventory service on it’s own server. Don’t worry about the existing Inventory service, we will remove that during the Vcenter Service install.

Reblogged this on Sutoprise Avenue, A SutoCom Source.
Pingback: VCenter 5.0 to 5.1 U1 Upgrade while Separating or Splitting out Services (Part 1): SSO Install | NutzandBolts - An IT Systems Engineer Experiences